 |
| The completed warping frame with its first warp |
That first Christmas we learnt to use it by weaving three scarves and two ties, which were given away as presents. These were made with a weaving book in one hand and the beater in the other, with the last one only being cut off and fulled late into the night before we set off to be with family.
 |
| The frame is oak and the pegs hazel |
I briefly looked at the Ashford warping frame, but at £75 ($120) pretty quickly dismissed it – not only on cost, but also because it was made in New Zealand and shipped over. I am sure that it is very nicely made, but it is only four bars with pegs coming out and so I set to making one. It has been an on/off project all through last year, but finally it is finished and we can return to weaving, as we haven’t touched it since the last scarf came off the loom that Christmas.
How to make a warping frame
Full plans for the warping frame can be download in .pdf by clicking here.
 | |
| The frame has mortise and tenon joints, secured with copper pins |
The uprights are cut to 80cm (31 ½”) in length and 25mm (1”) long tenons are cut at the end, at a width of 6mm (1/4”). The horizontal members are 103cm (40 ½”) as this allows the spacing from peg to peg to be around 1m (39 ½”), which makes for an easy rough and ready warp length calculation. If you are more comfortable with imperial measurements you could always adjust it to make them a yard apart. I then cut the mortises in the horizontal members.
It is easier to drill the holes for the pegs before you assemble the frame, although I put them in at the end. For my pegs I used hazel; it is a local wood that grows in coppices and hence the rods are reasonably straight. It isn’t a particularly strong wood, but by simply debarking it and using it ‘in the round’ I am retaining the strength of the grain. It is quite important that the pegs are straight as a significant variation throughout the length of the peg will be reflected in the warp. However, it does only really need to be straight on one side (i.e. the outer one around which the warp turns). Quite whether these hazel pegs are straight enough I am not sure – I guess time will tell – if not I will replace them with oak dowel. The pegs are 16.5cm (6 ½”) long and around 12mm (1/2”) in diameter (in actual fact the diameter of the pegs are quite varied being hazel rods – which I love – but dowel would obviously give a consistent finish). Drill the hole slightly smaller than the pegs.
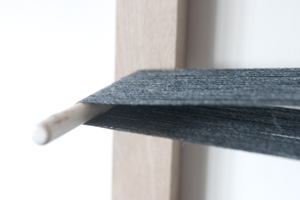 |
| It is important that the pegs be square to the frame |
The upper horizontal member has the centre of the first hole 10cm (4”) in from the left handside, then two more, both at 20cm (8”) intervals. The lower member is the same, except you measure from the right hand edge.
 |
| Download a .pdf version of the plan by clicking here |
Finally screw in four brass hooks so that the frame can be mounted on the wall.
And there we are, another tool handmade – saving me money, teaching me new skills and reducing my impact on the environment. I dare say the Ashford one is a little more ‘polished’, but I rather like the natural look of ours. Right, time to get going on our first warp...


